
In a previous post, we analyzed the SysJoker malware. We raised the concern that we saw indicators of potential network connections. Unfortunately, eslogger does not expose much in the way of networking events. So we were left wondering if the malware was phoning home or otherwise.
We’ve now added networking events to ESEV.
This is accomplished through a NetworkExtension which enables read-only visibility of network connections and DNS lookups. For details check out Apple’s official documentation. Jamie Wood, also from Apple, gave a WWDC talk in 2019 that provides a good overview and example code called SimpleFirewall.
Using our new network features comes with the requirement to install the aforementioned network extension.
Network Events
ESEV will capture all incoming and outgoing network events. These network events show up in ESEV as type networkflow.
Some example events:

When available networkflow events may contain any combination of:
- Local address and port
- Remote address and port
- Protocol
- Remote hostname
- URL
Here we highlight the simple view of the network connection.

In the simplified view we try to replace IP addresses and Port numbers with names when possible. Use the hover and detailed view if you’d like to see the IP addresses and port numbers directly.
- Green
- local_address - 192.168.64.3
- local_port - 58104
- Purple
- remote_address - api.apple-cloudkit.com
- remote_port - https
- Yellow
- direction -
->, outgoing from local to remote - protocol - TCP
- direction -
Hoving over the event will pop up the detailed description which we highlight for you here.
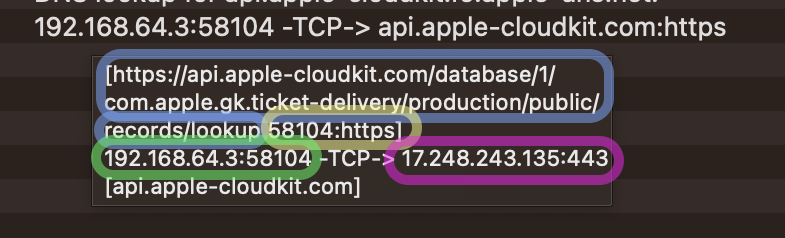
- Blue
- Full URL (if exists) - https://api.apple-cloudkit.com/database/1/com.apple.gk.ticket-delivery/production/public/records/lookup
- Yellow - simplified port names if possible
- local_port - 58104
- remote_port - https
- Green - not resolved to simplified names
- local_address - 192.168.64.3
- local_port - 58104
- Purple - not resolved to simplified names
- remote_address - 17.248.243.135
- remote_port - 443
- Direction and Protocol are shown the same as in the simplified view explained above -TCP->
- Remote hostname is provided at the end of the line (if exists) - api.apple-cloudkit.com
Some connections will show local as ANY_LOCAL. That means the IP/Port pair are 0.0.0.0:0.
Hope you find the new events useful!!
Starting Network Capture
You will start by selecting the new network globe icon in the toolbar.
![]()
Once you’ve selected the globe (and it’s installed the extension) the globe will turn blue.
![]()
Events will then begin to stream into ESEV.
Revisiting SysJoker Malware
To follow along using ESEV at home, download the events.
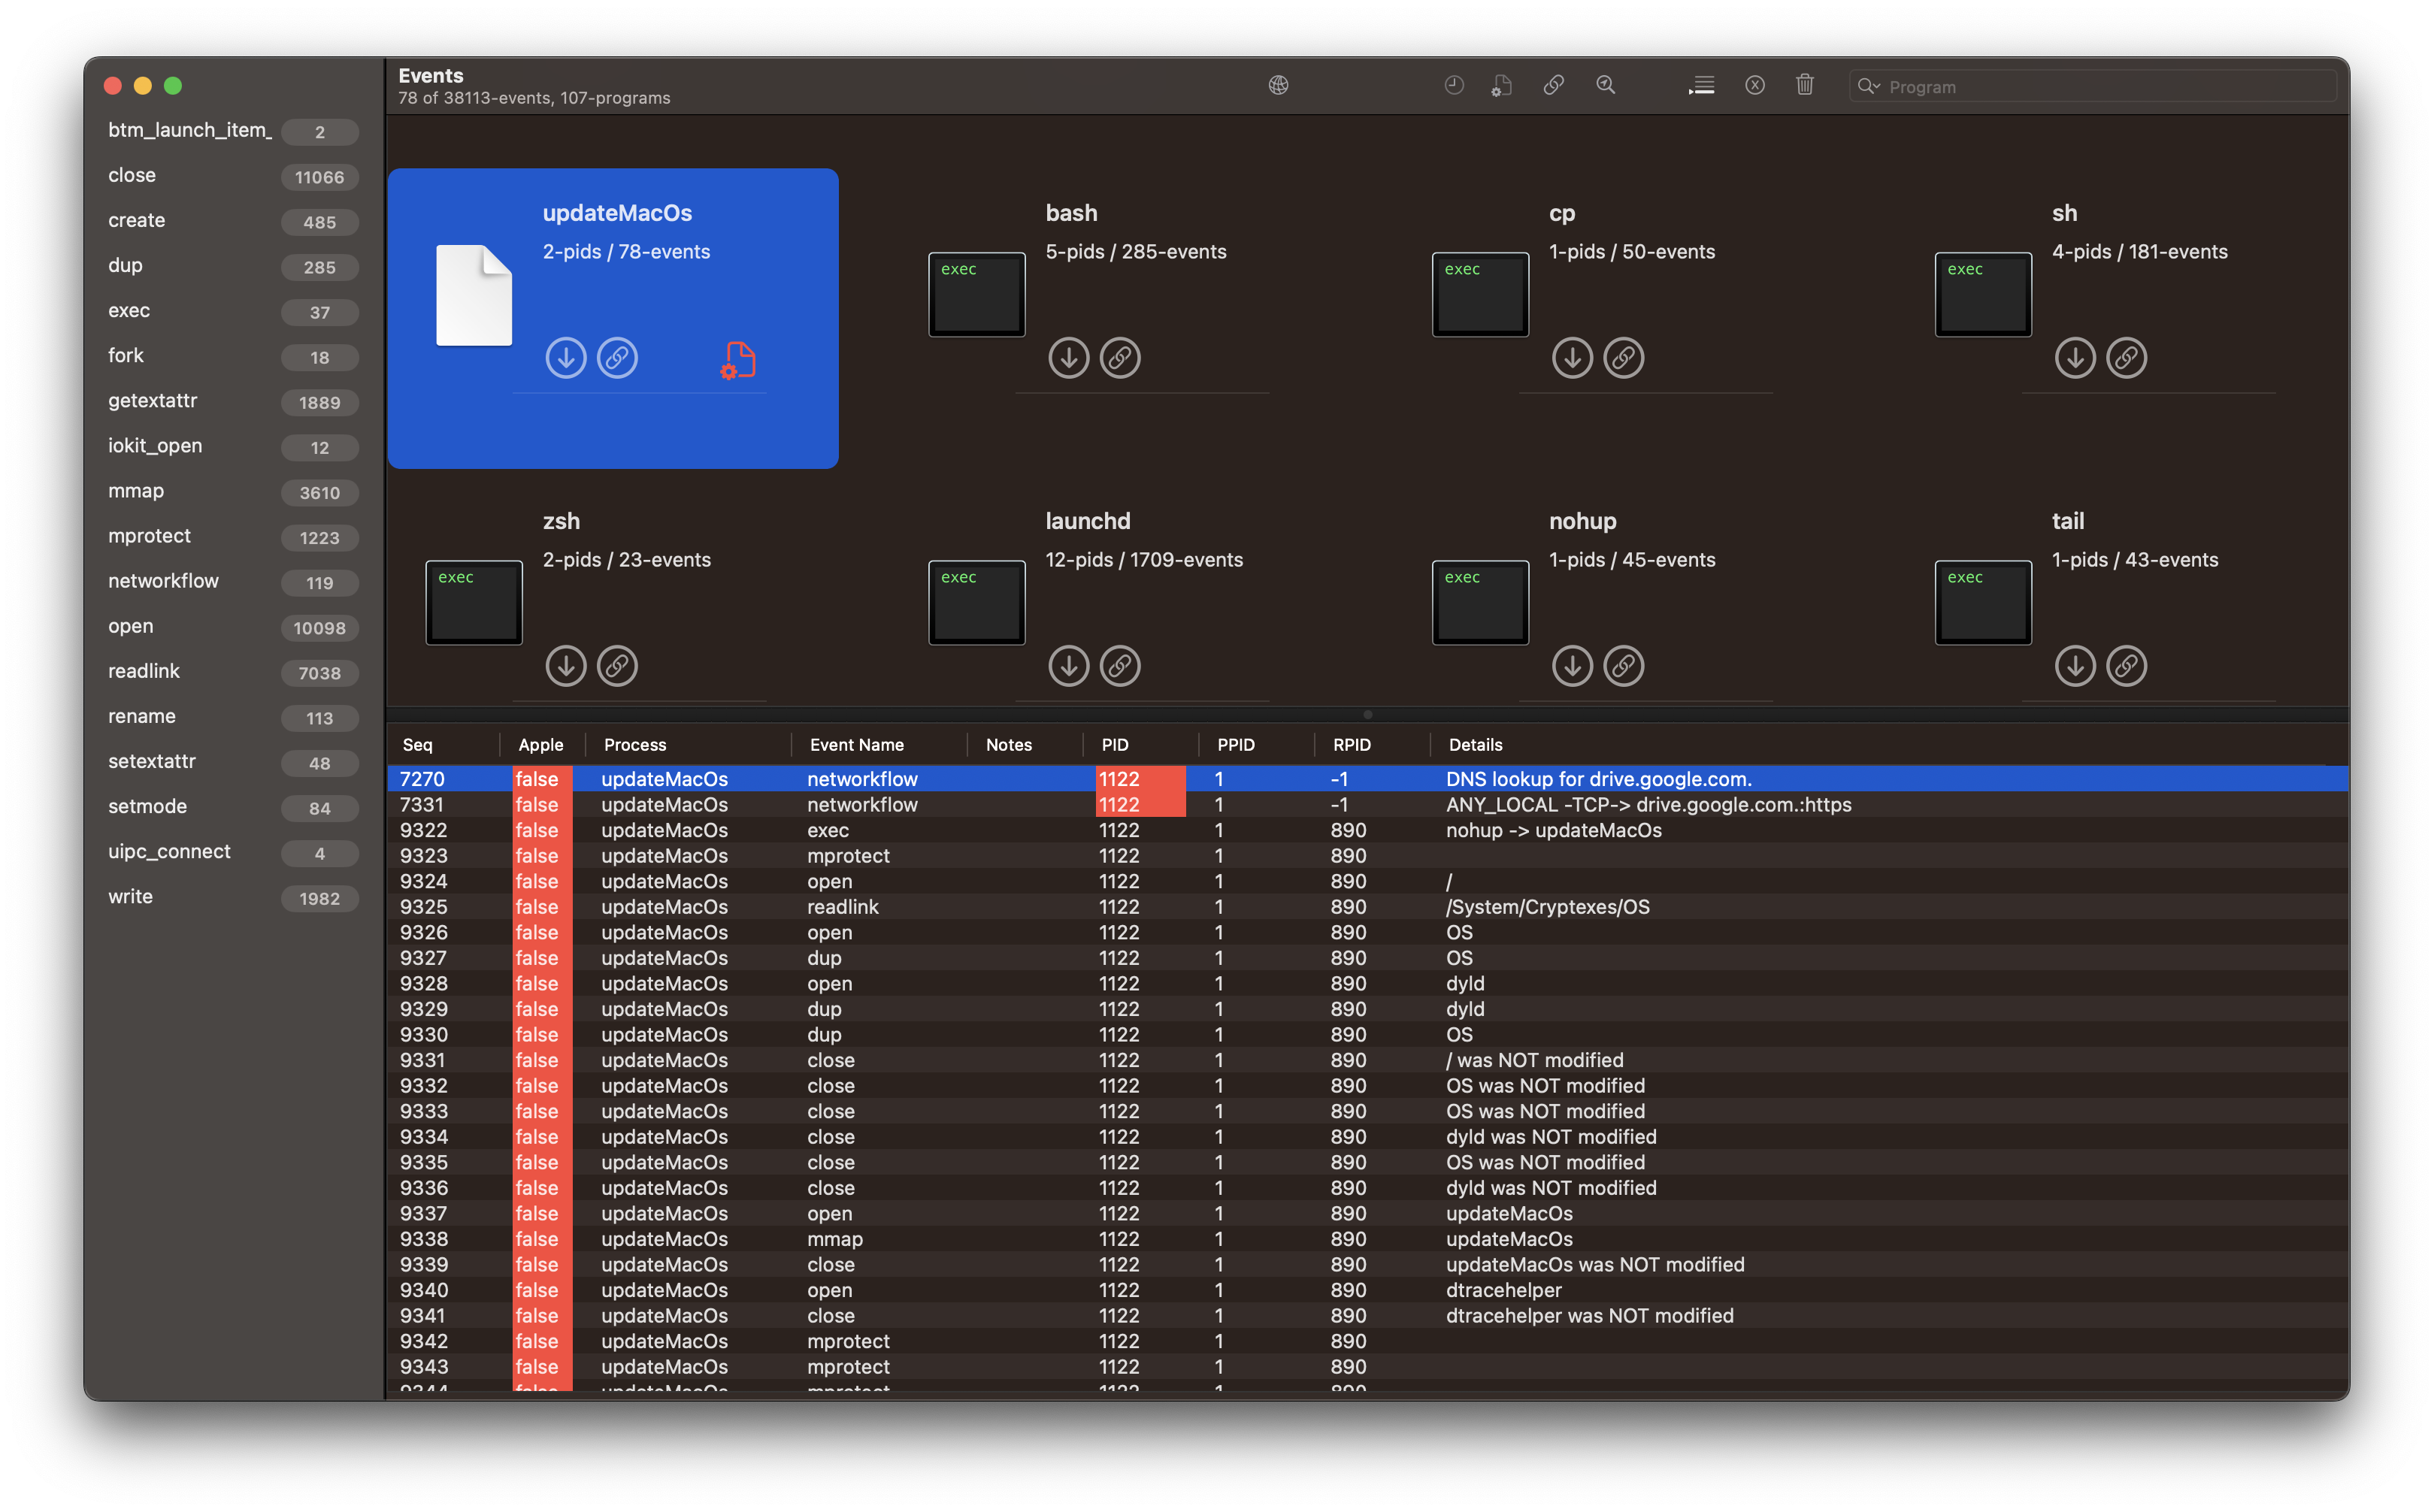
- seq #7270 the malware performs a DNS lookup for
drive.google.com. - seq #7331 the malware makes an HTTPS connection to
drive.google.com
Network Extension Status
You can review the state of the ESEV network extension by using systemextensionctl.
nub@nubtop % systemextensionctl list
1 extension(s)
--- com.apple.system_extension.network_extension
enabled active	teamID	bundleID (version)		name  [state]
*       *       K2PD5G2H92    xyz.nubco.ESEV.NetworkFlow (1.0/3)    NetworkFlow   [activated enabled]
For extensions that have been installed they’re not truly gone untill you reboot.
nub@nubtop % systemextensionctl list
1 extension(s)
--- com.apple.system_extension.network_extension
enabled active	teamID	bundleID (version)		name  [state]
               K2PD5G2H92    xyz.nubco.ESEV.NetworkFlow (1.0/3)    NetworkFlow   [terminated waiting to uninstall on reboot]
Installing Network Extension
Like any system extension on macOS, there are some installation steps required. It’s just a series of dialogs the users needs to click through and macOS makes it fairly easy to do so, but it’s also a set of steps that cause pause for any security-conscious user.
First though, for network monitoring to work ESEV must be installed in the /Applications directory, this is a macOS system extension requirement.
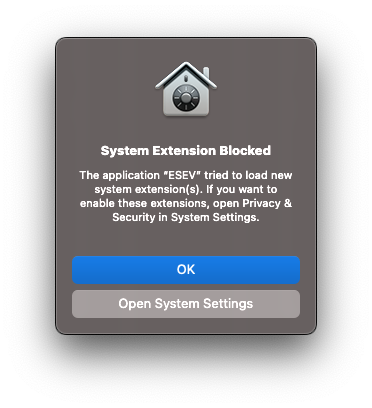
Select the grey button Open System Settings. This opens the Privacy & Security settings dialog where you’ll need to approve the blocked system extension install. We’ve highlighted in yellow below the spot to select Allow. This will enable ESEV to install the Network Extension (which is of type system extension).
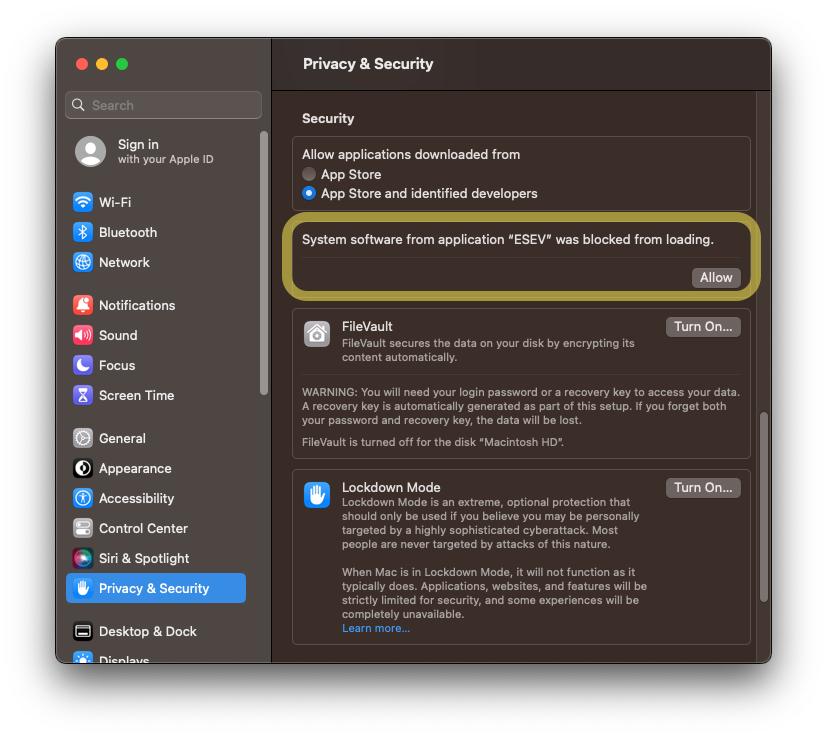
Now that you’ve allowed the installation of the system extension, Apple has one more check for you to allow. This is where macOS is making sure you understand the system extension you allowed will be filtering network content. The type of Network Extension that ESEV installs can technically allow or deny connections like a firewall, but ESEV simply allows all connections to act as a passive read-only entity enabling you to see all the network connections without the ability to disrupt network activity.
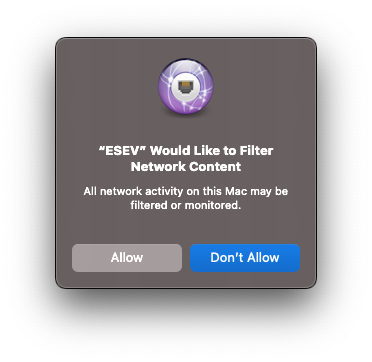
Once you select allow here the networking will be enabled and you won’t need to repeat these steps unless you uninstall the extension of course.
Uninstalling Network Extension
The network extension is installed and running even if ESEV is not running. This is the case for all system extensions. A little bit of a one-way street. Most of the time this is what you want. Imagine if your firewall stopped working when you closed the UI or the user that started it logged out.
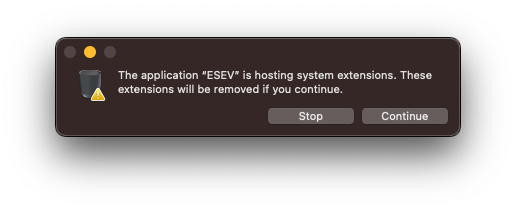
The simplest way to remove the extension is to move the ESEV application to the trash can. Immediately after you add it to the trash it will request access to uninstall the system extension. This will happen without needing to empty the trash. Note though the system extension is not fully uninstalled until reboot. If desired you can drag ESEV out of the trash at this point if you just wanted to uninstall the extension.
Network Event gotchas
There are a couple of minor gotchas with networkflow events.
Events in ESEV are organized by eslogger’s global_seq_num. This creates a problem because the network extension and eslogger are generating events separately. When pulling events in from eslogger (say through tailing) and at the same time capturing networkflow events, the networkflow events may have multiple events with the same sequence number. This helps to visually align the network events with the eslogger events. This will be solved in a future version.
We currently do not resolve the responsible pid nor its audit_token. This will display in the UI and JSON as all -1.
We currently do not resolve ESFile Stat details. This will display in the UI and JSON as all 0.
If using the App Store version, some APIs get denied by the Sandbox that are required for the network extension. This prevents certain actions like gathering parentPID’s audit_token and resolving some processes signing details…meaning some applications may show as “non-Apple” which are actually Apple. These limitations are only on the version in the App Store.
It’s becoming painfully more apparent why there are no security applications in the Mac App Store :(